PuppetMaster Lesson Plans / The Fox and the Grapes
Grade:
Kindergarten – Grade 3
Lesson Objectives/ Instructional Outcomes:
- Students will be able to explore a narrative text for the main idea/message.
- Students will be able to apply knowledge of character attributes to develop a puppet.
- Students will be able to communicate the main idea or central idea of a text.
- Students will be able to publish a multimedia project that presents their knowledge of the narrative.

Common Core Standards:
ISTE Standards:
Relationship to Unit Structure:
Our way of communication often incorporates many idioms or expressions that — when taken literally — don’t make a lot of sense. If you have ever been confused about what these phrases mean or where they came from (we know we have), you can only imagine how we must sound to foreign language learners or young children! This lesson asks students to explore fables to understand the origin and meaning from these more confusing expressions.
Instructional Materials/ Resources:
- Expressions from Aesop (Mental Floss)
- Aesop’s Fables
- Materials for Fox Puppet Craft (See Tutorials & Printables section of this page)
- Materials for Background with Grapes Craft (See Tutorials & Printables section of this page)
- PuppetMaster App
Anticipated Student Challenges:
- Students may struggle with the craft on their own, and may prefer to create their own puppets with crayons or markers.
- Stories may be a little too elevated in their original form, so teachers are encouraged to find simplified versions of these narratives.
Day 1
Anticipatory Set:
- Read: The Fox & The Grapes
- Discussion:
– What do you think it means to say “sour grapes”?
– Have you ever had a situation like that in your life?
– Do you think it’s good to act like you didn’t want something? Or is it better to admit you wanted it and just be a bit sad you didn’t get it?
Instruction & Lesson Activities:
(See Tutorials & Printables section of this page for details)
- Puppet Party: Show the kids how to make their own fox puppets, and help them make them.
- Background Building: Make a background together or allow kids to each make one separately.
- Alternative: If you choose to cover several stories, you can group students and have each group work together on an individual story. Each group will make puppets and backgrounds relevant to their story.
Closure:
Students can share their puppet with their peers and describe their individual choices, personalized details they included in their puppet.
Homework:
None
Day 2 / Day 3
Anticipatory Set:
Teacher reviews App with students, showing an example of creating a puppet, background, and animation.
Instruction & Lesson Activities:
(See Tutorials & Printables section of this page for details)
Workshop:
- Puppet building in app
- Background building in app
- Script writing for PuppetMaster videos
- Creating PuppetMaster videos in app and exporting to photo library
Closure:
Theater: Students share their videos with their class or in small groups
Homework:
None
Differentiation Strategies:
- This is a student-centered lesson that allows them to communicate their understanding.
- Students are invited to create their own puppet using found materials, drawings, or other craft products. Templates are available if necessary.
- Teachers can group students or allow students to work individually.
Assessment:
- Puppet
- Background
- Message
- PuppetMaster Video
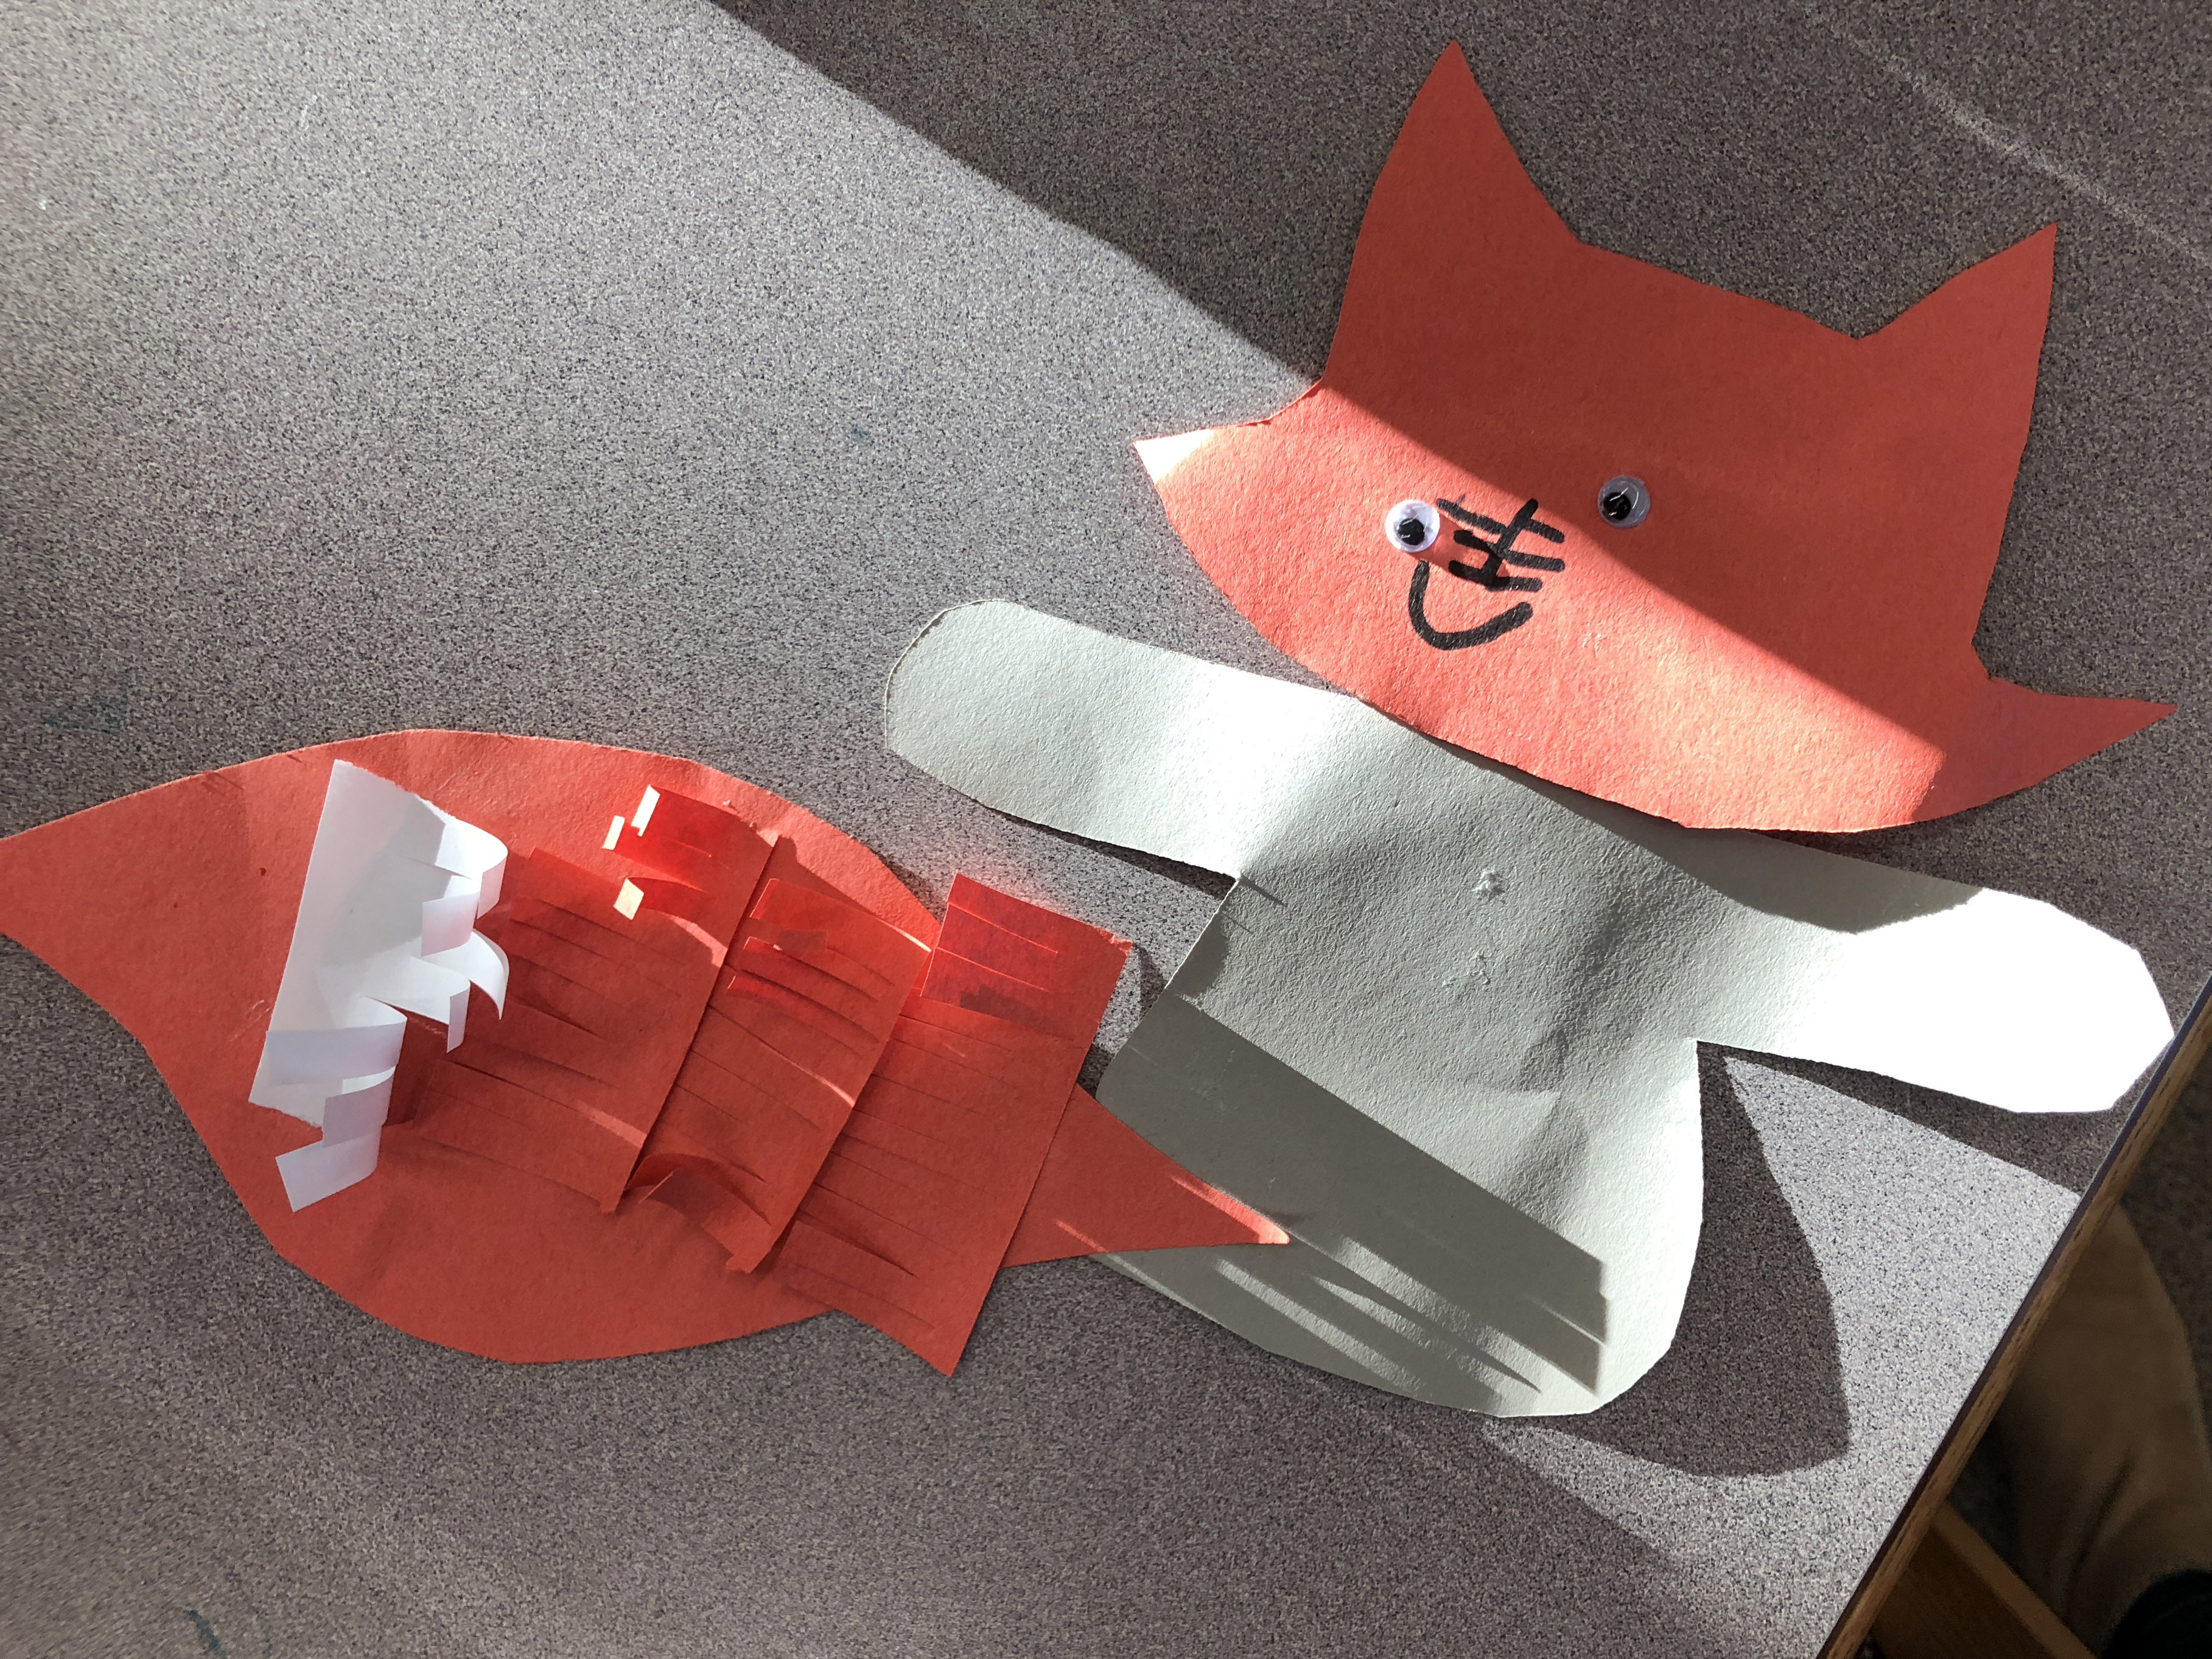
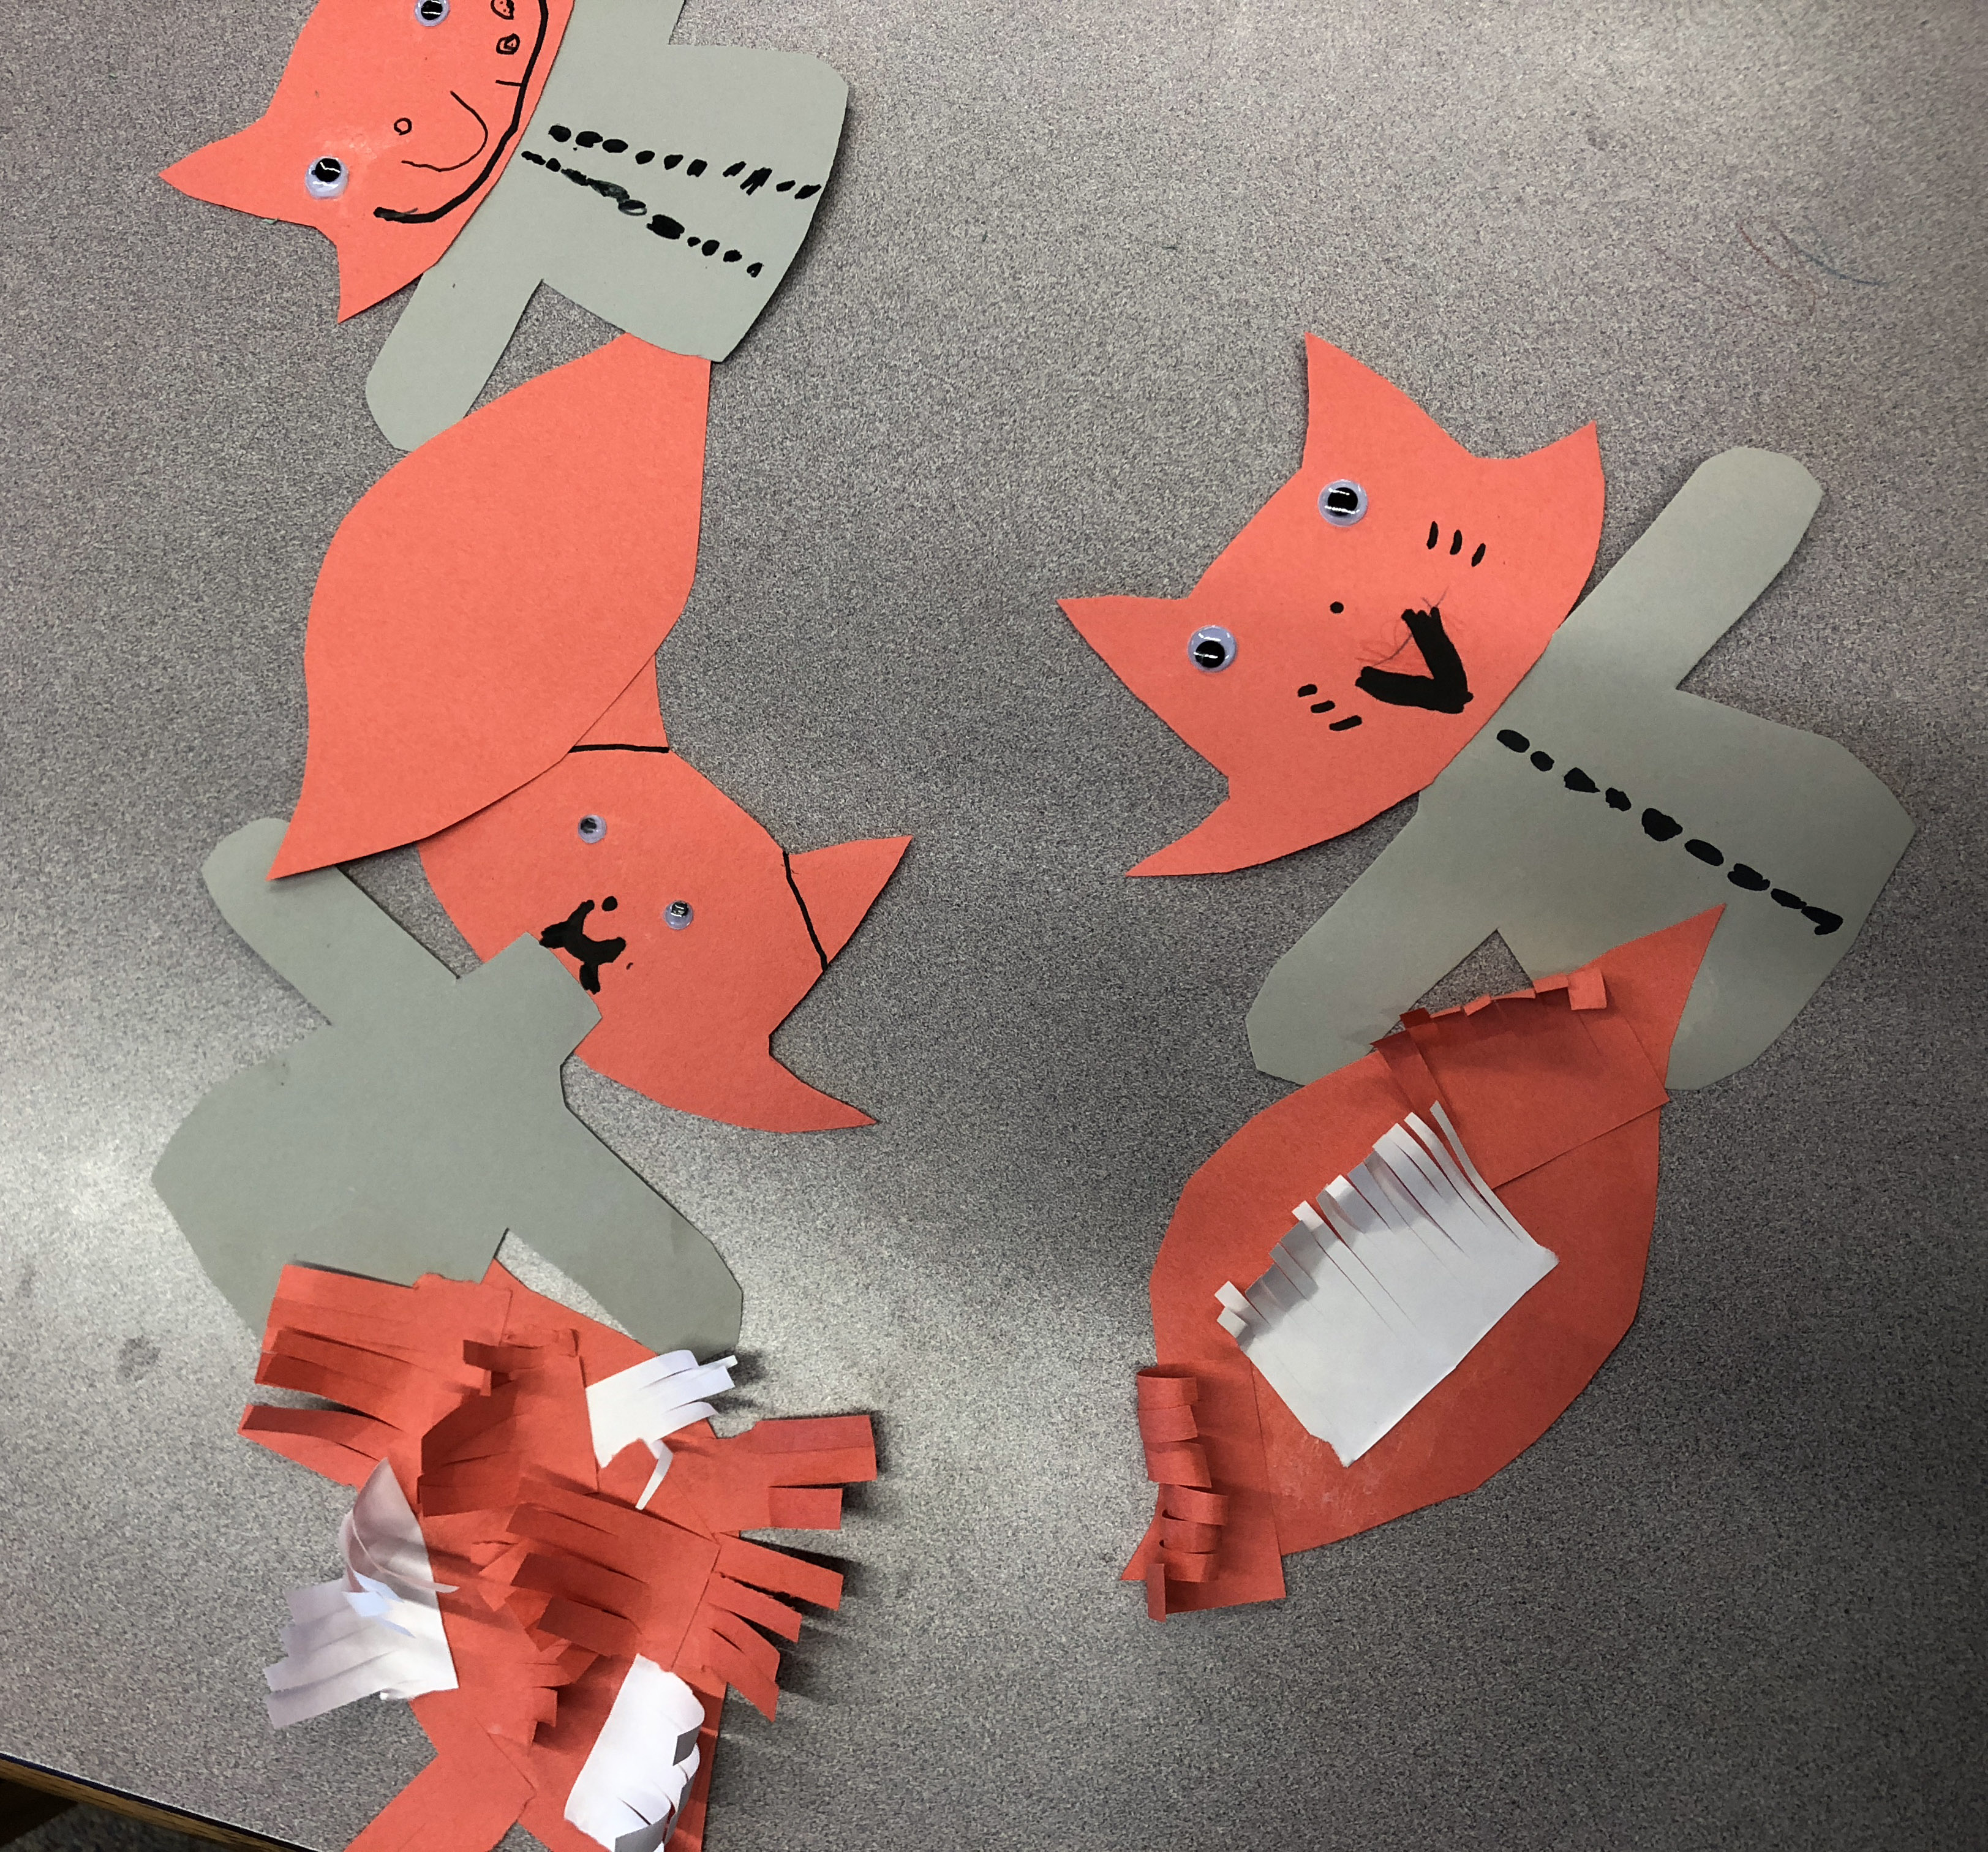
Fox Puppet
Following are two versions of the fox puppet, feel free to choose either or combine elements of both.
Advanced Fox Puppet
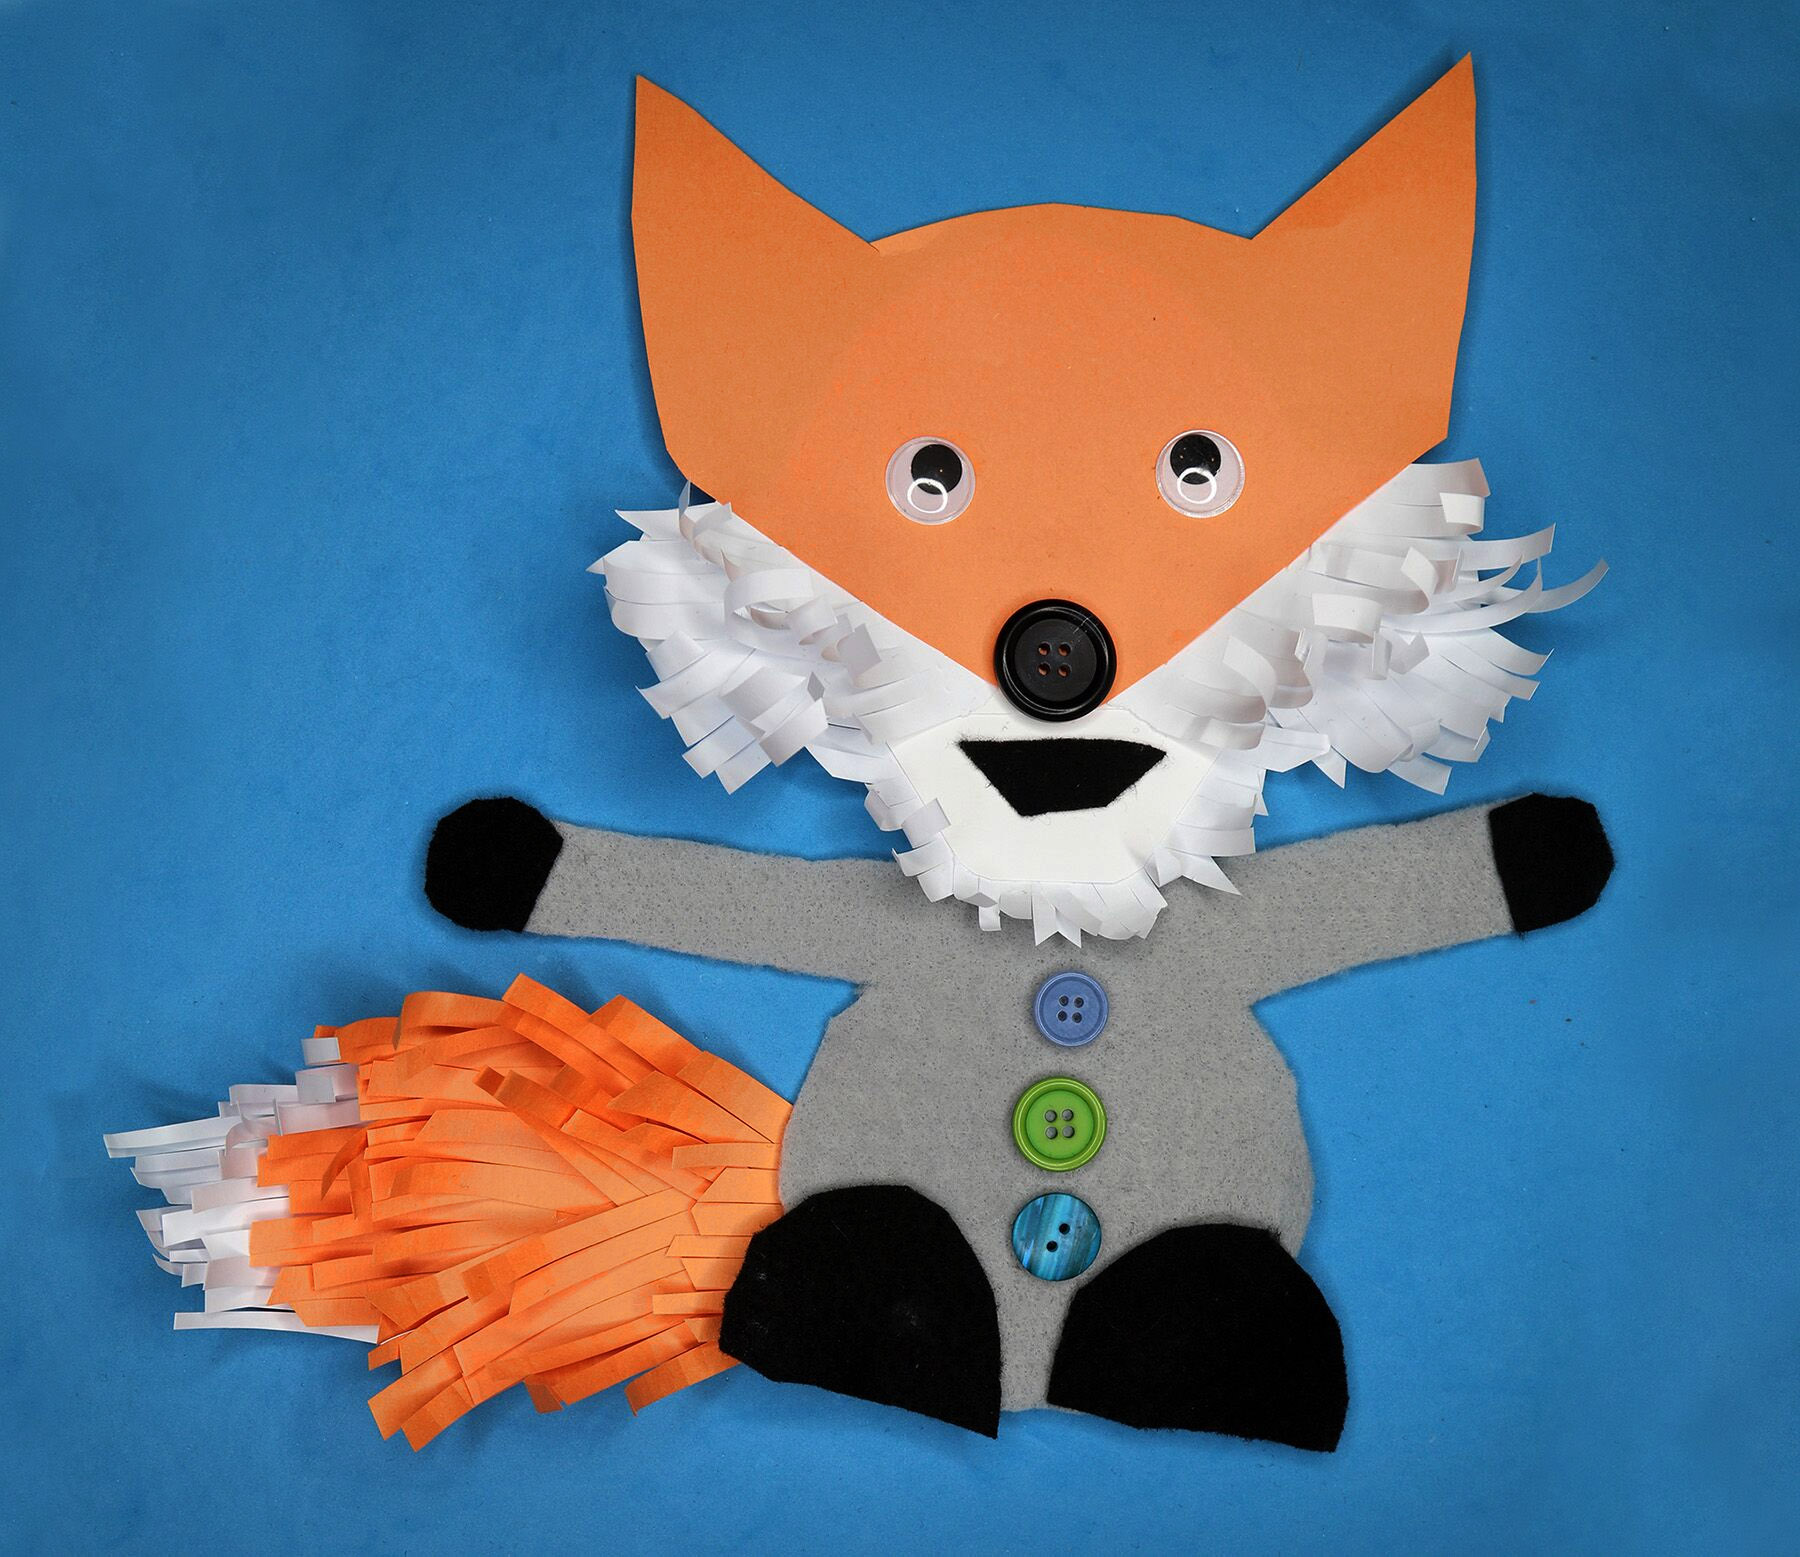
Materials:
- White paper
- Orange or red paper
- Felt – black and another color (grey in this example)
- Buttons – one black, some other colors
- Googly eyes
- Pencils or markers
- Cardboard – small piece for backing
- Glue
- Scissors
Instructions:
See video.
Note: We found it difficult to get pieces of felt to stick with this type of glue! You may have better results substituting a different material for felt, or a different sort of glue that works better with fabric. We do not recommend hot glue, however, as the heat is dangerous.
Simplified Fox Puppet
Materials:
- White paper
- Orange or red paper
- Paper in additional colors
- Googly eyes
- Pencils
- Markers and/or oil pastels
- Glue or glue stick
- Scissors
- Template below (optional)
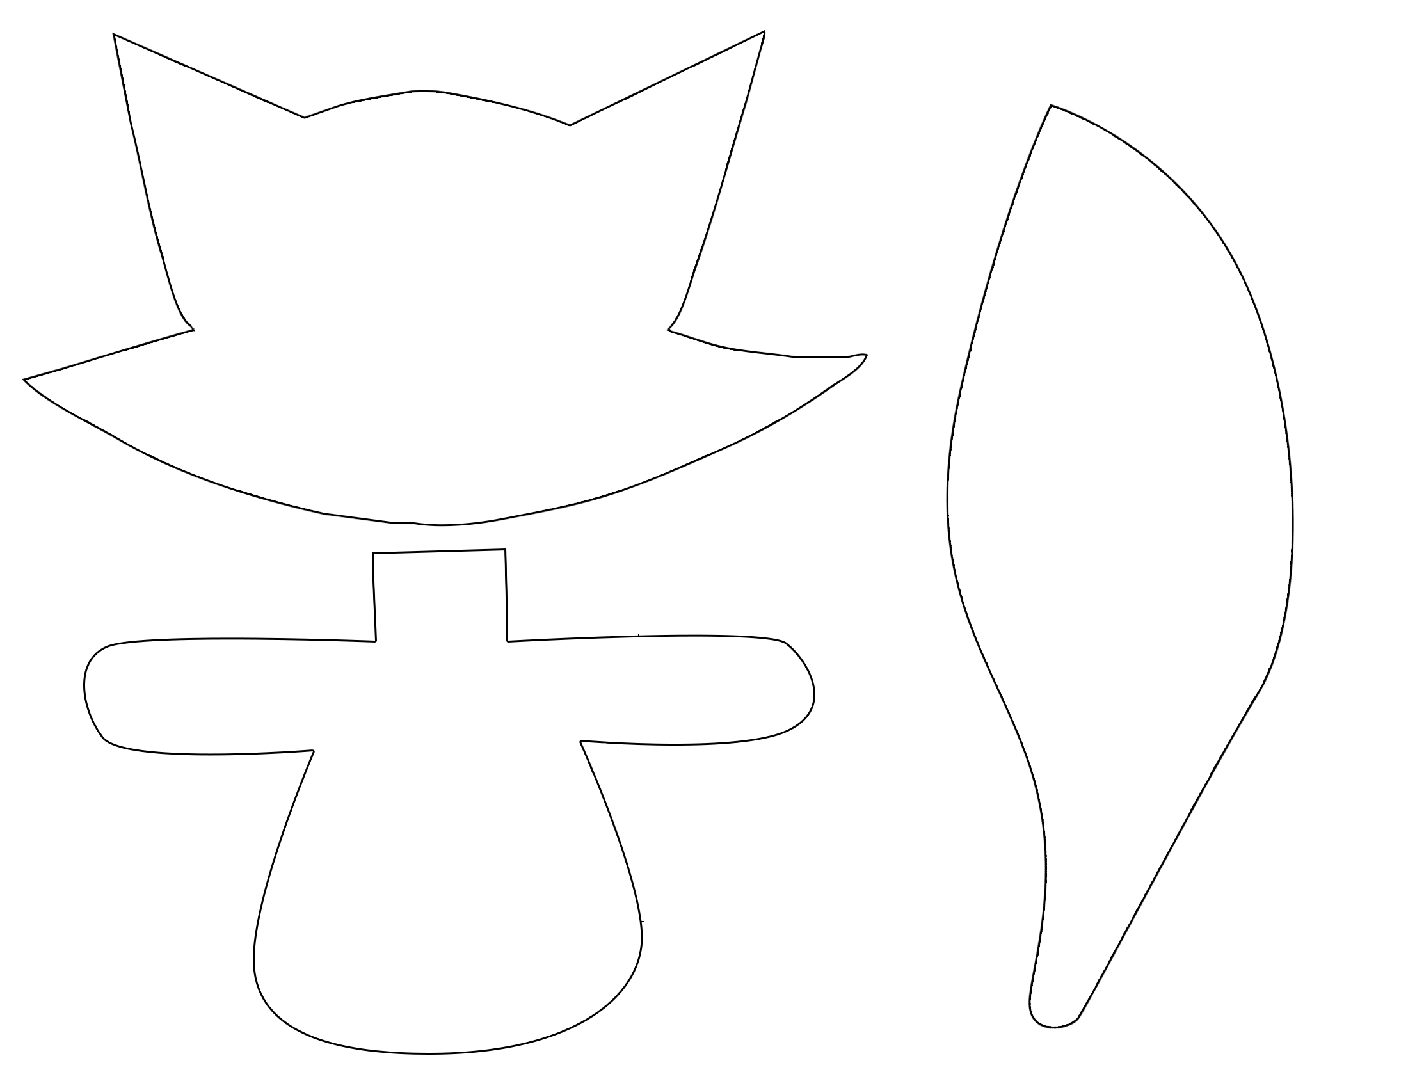
Instructions:
- Prepare in advance, for each student and a few extra, a piece for the head, body, and tail. Use printout here to cut and trace. Suggestion: stack several papers, folded into quarters or half. Trace the shape on the top one, and cut the entire stack, providing several pieces at once.
- Alternatively, give students the freedom to draw their own and perhaps prepare only a few as backups.
- Head and tail will be cut out from orange or red paper. Body can be any color, you can provide several options so kids can further personalize their fox.
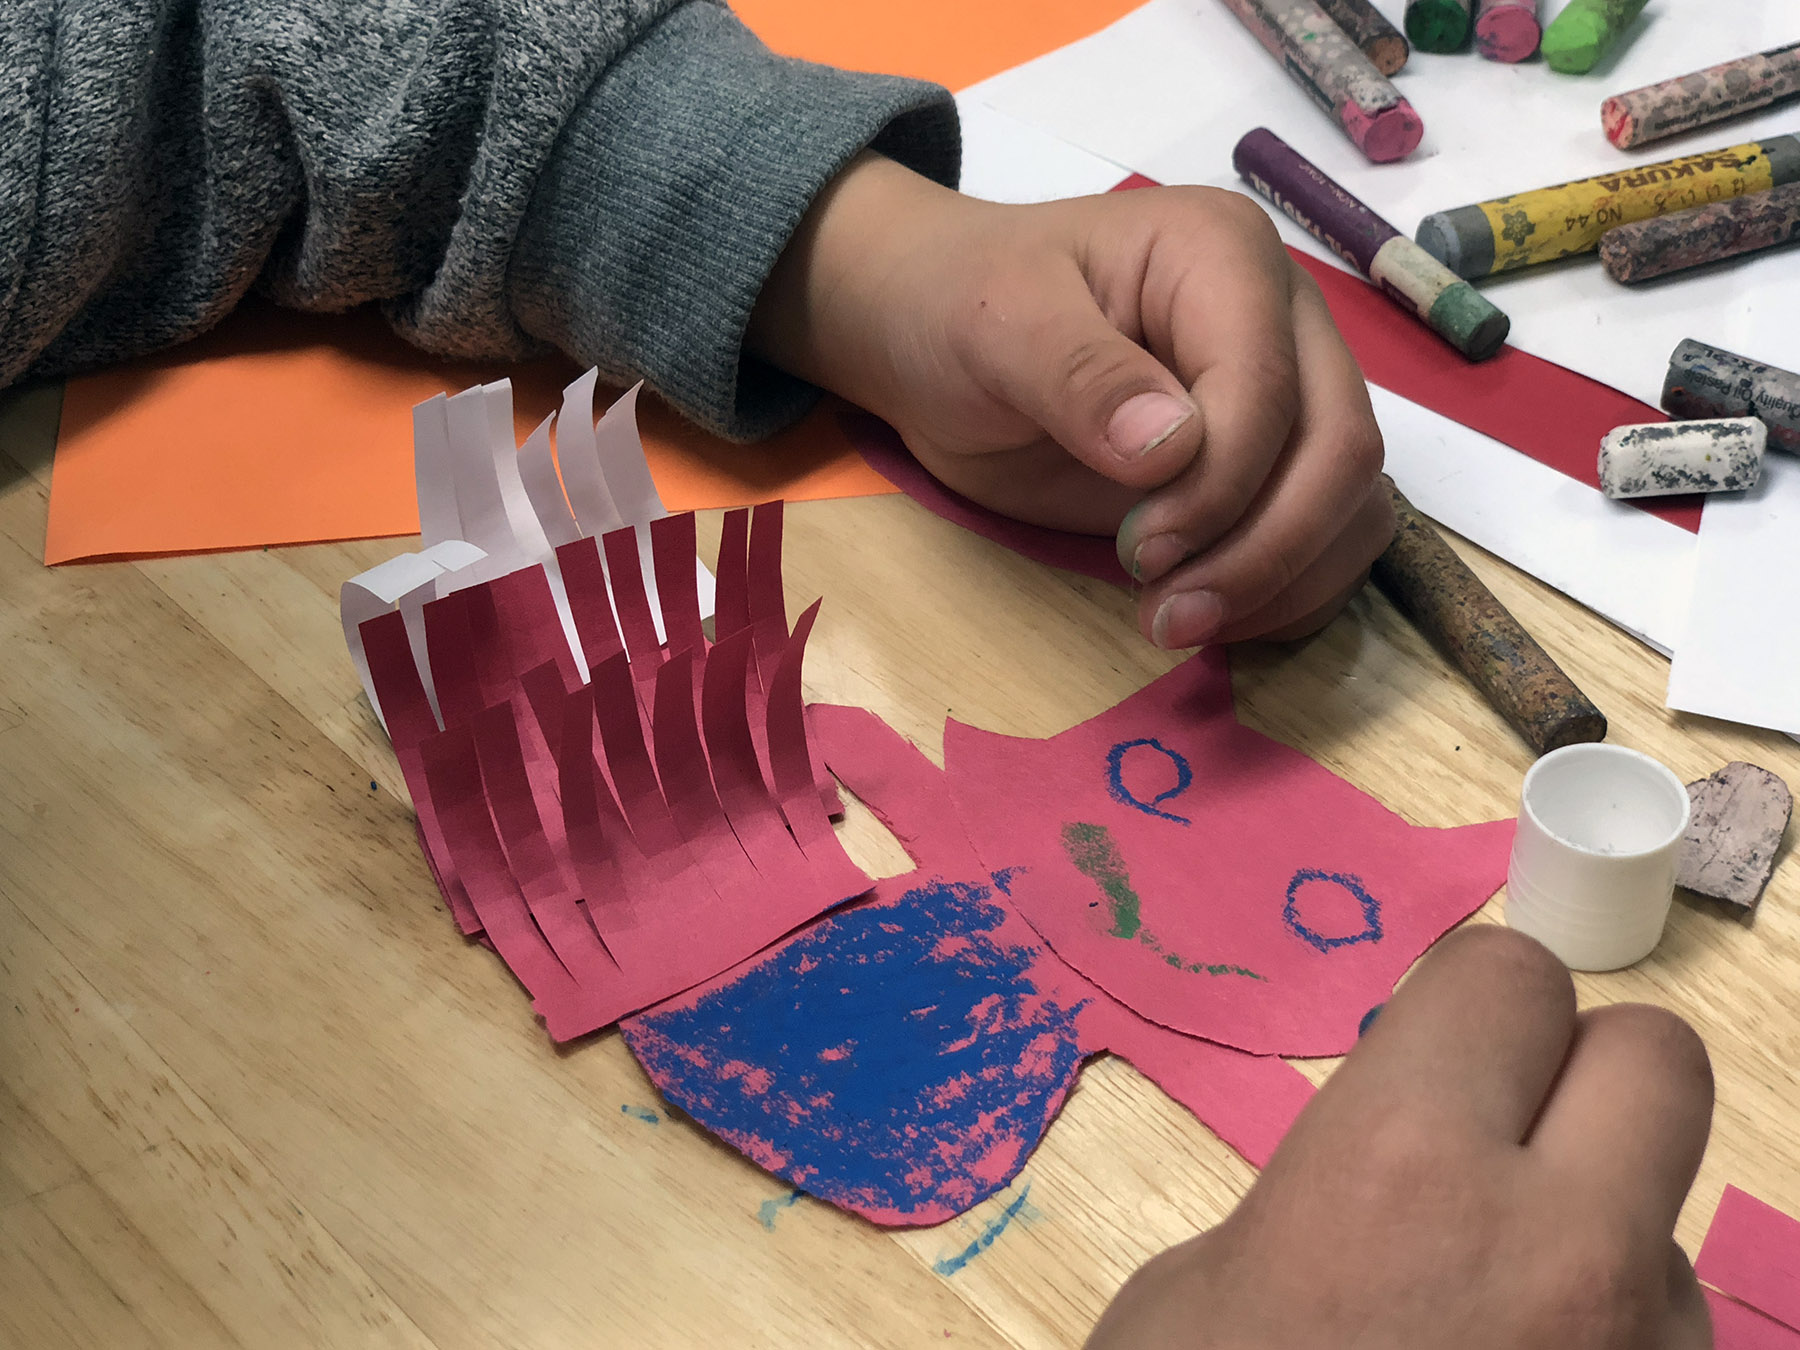
- Prepare curly “fluffy” pieces in advance, and also continue making more of them together with the students. Cut long rectangular strips of white paper, and red or orange paper. Then, in each strip, cut several slits almost all the way across but not completely, leaving one edge connected. Curl them around a pencil or marker; markers gave smoother results because of their shape. (See video of advanced fox for creation of fluffy pieces.)
- Students glue the main pieces together. The neck of the body piece gives some extra space on top of which to glue the head; it will animate better if the head doesn’t obscure the arms in any way. The tail gets blued by its tip onto the back of the body, directed sideways so it doesn’t cross over the arm.
- Students glue fluffy fur pieces onto the fox by gluing the solid edge and letting the rest curl up. Good positions are the cheeks and the tail. For realism, put red/orange pieces on most of the tail, and white pieces on its tip. It’s easier to glue the pieces on the tail tip before the ones on the base of the tail. (See video of advanced fox.)
- Optionally break up the straight edges of the fluffy bits by snipping the ends irregularly, like a little haircut. (See video of advanced fox.)
- Students make face with googly eyes and markers, and decorate the clothes with any materials you have handy. If you don’t have googly eyes, the challenge becomes the whites of the eyes to make the eyes pop on the darker paper – try oil pastels, or circular binder reinforcement stickers. For best animation results, make simple mouth with some thickness, so that when it gets vertically bigger and smaller during lip-sync, it appears to open and close.

Background with Grapes
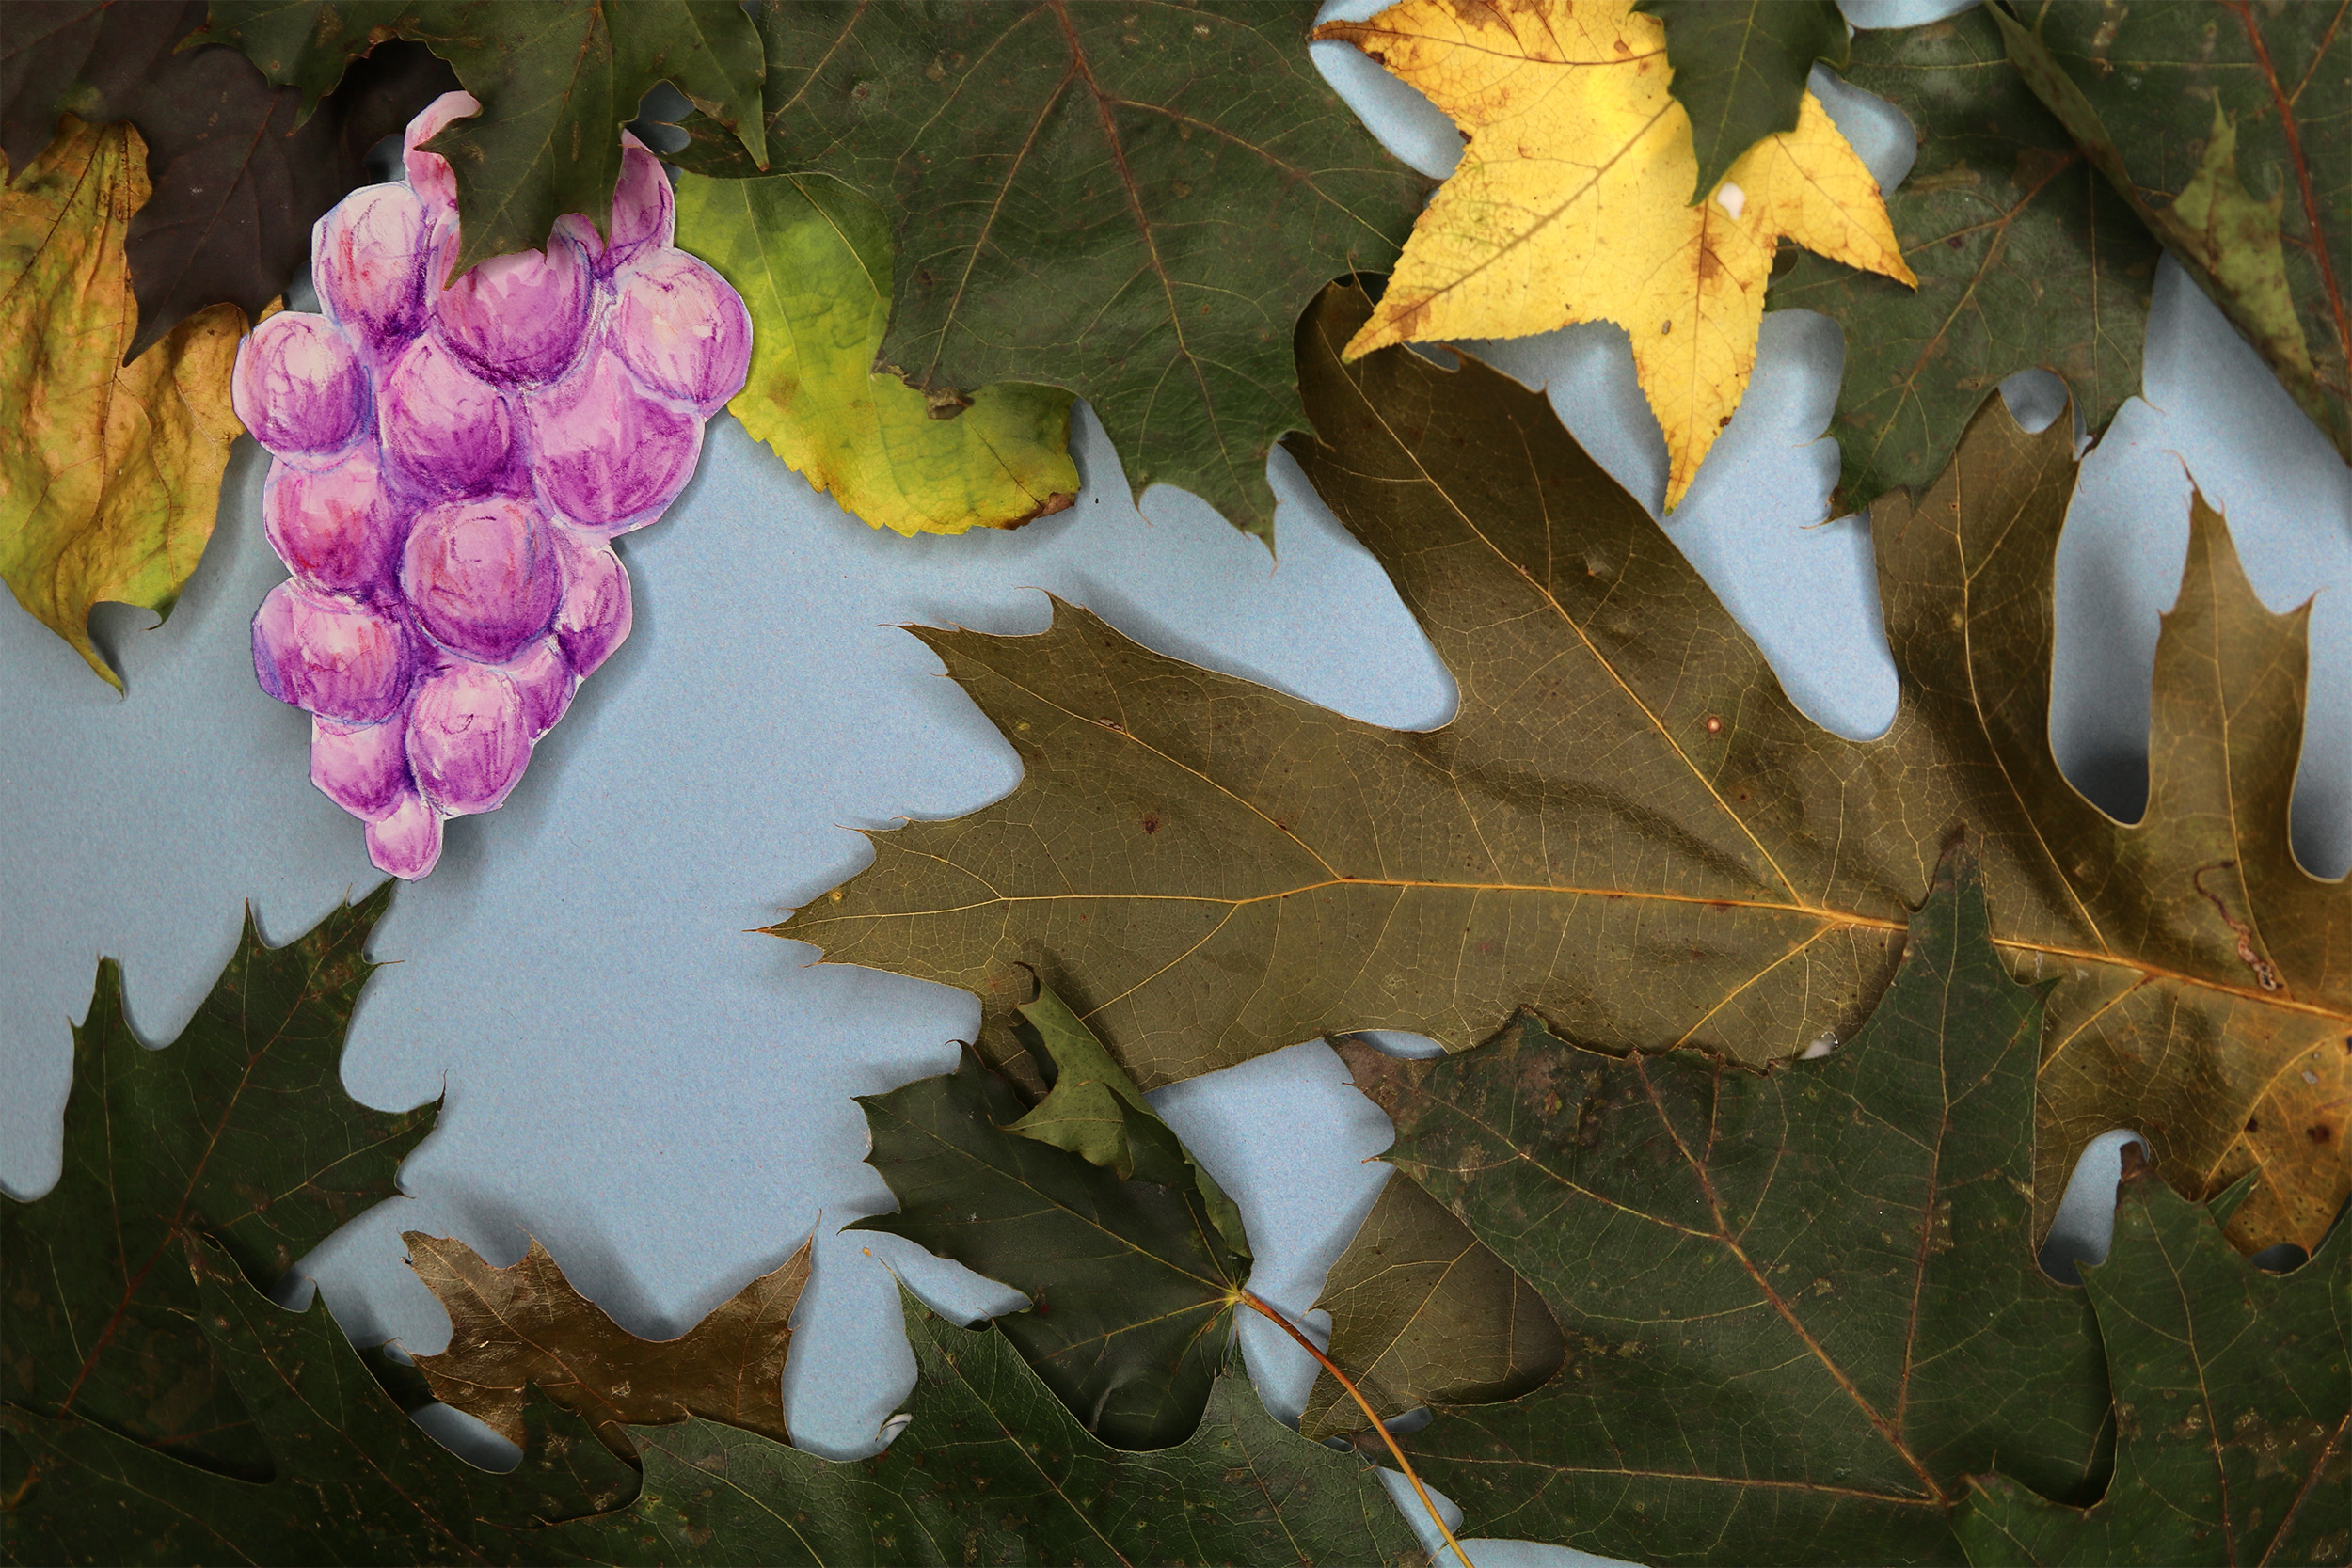
Tips:
- The important thing here is to show some grapes, ideally high in the image and maybe off to one side, to give the fox space to try to reach for them.
- This is example is a collage featuring dried leaves we found outside on light blue construction paper. Grapes were drawn on white cardboard with watercolor pencils, since we happened to have those handy. Any other medium would work fine too. Another option would be clay rolled up into little balls.
- Background can be made together as a group. Or if time allows, each student can make their own background.
- Alternatively, you can search photographs from a royalty free photo site like pexels.com. Download them and edit them in the Photos app if necessary.
Creating the PuppetMaster Animation
See video for complete process of creating the puppet, background, and animation:
Tips:
- You may find it useful to photograph the kids’ foxes and backgrounds with the device camera before even entering the PuppetMaster app. That way they are saved in your Photo Library for reusing or sharing.
- Try placing the artwork on the floor or low table, especially if still wet, so students can photograph from the top down and see the screen.
- In our example, we’ve made the body parts overlap for a continuous look.
- Marking the body parts in the app doesn’t have to be perfect, you can always go back in and edit this later.
- Don’t forget to place the puppet joints in the right spot at the last step. The Auto-fit button give a good start but usually some adjustments are necessary, and then of course hit the Save button. (Note: With our fox’s tail off to the side, the pelvis joint in particular gets put on the side when using Auto-Fit, but animation will work better if you move it more directly under the chest and head joints.)
- If animating with motion capture (moving your body in front of the camera), make sure only one student is in the shot, and try for a plain background. Keep hair out of face, tucked behind ears. Student should speak loudly so device will pick it up.
- If animating with screen touch, don’t forget multi-touch – you can drag the whole puppet around with one finger, use another finger to move a hand, another finger to move the head, etc. So get in there with both hands and multiple fingers.
- Don’t forget to hit Export and save the animation, and let it finish. The saved video will be in your Photo library. You can upload it to Google Drive or anywhere else. You can even take the video into other apps, if you want to edit together several “takes” of the animation, or do any other types of video editing to it.
See video for animation process using motion capture and screen touch methods: