PuppetMaster Lesson Plans / Where I’m From
Grade:
Kindergarten – Grade 3
Lesson Objectives/ Instructional Outcomes:
- Students will be able to reflect on personal memories and experiences to collect ideas
- Students will be able to use a graphic organizer to develop ideas further
- Students will be able to create an identity poem incorporating aspects of scenery, mood, and characterization
- Students will be able to publish a multimedia project that presents their poem and artwork

Common Core Standards:
ISTE Standards:
Relationship to Unit Structure:
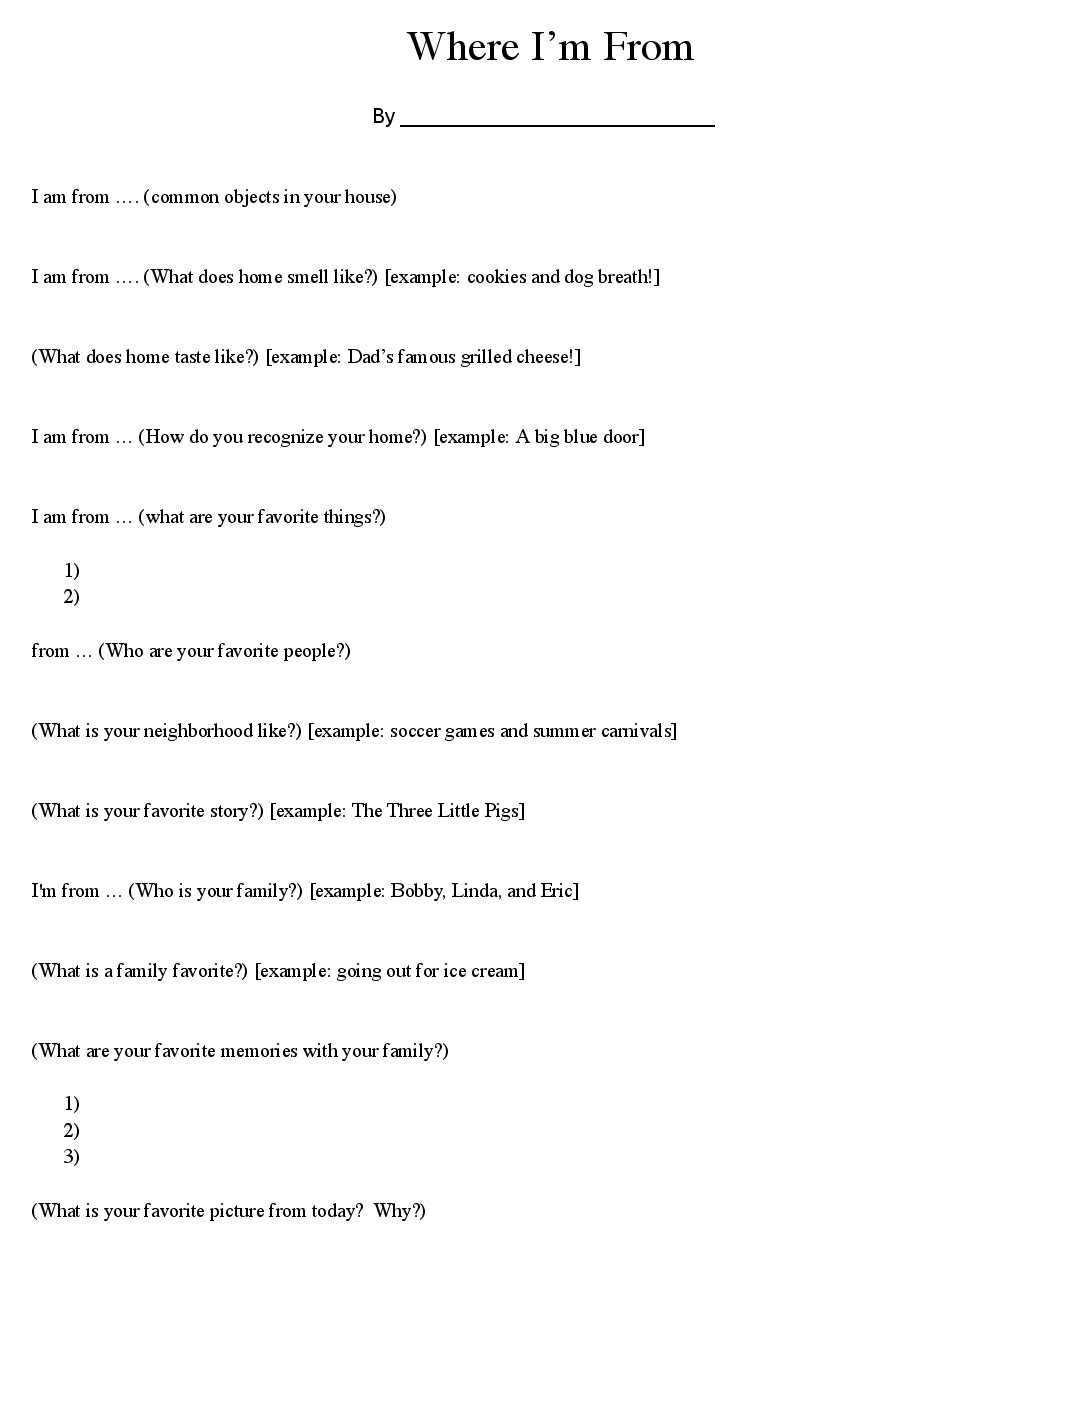
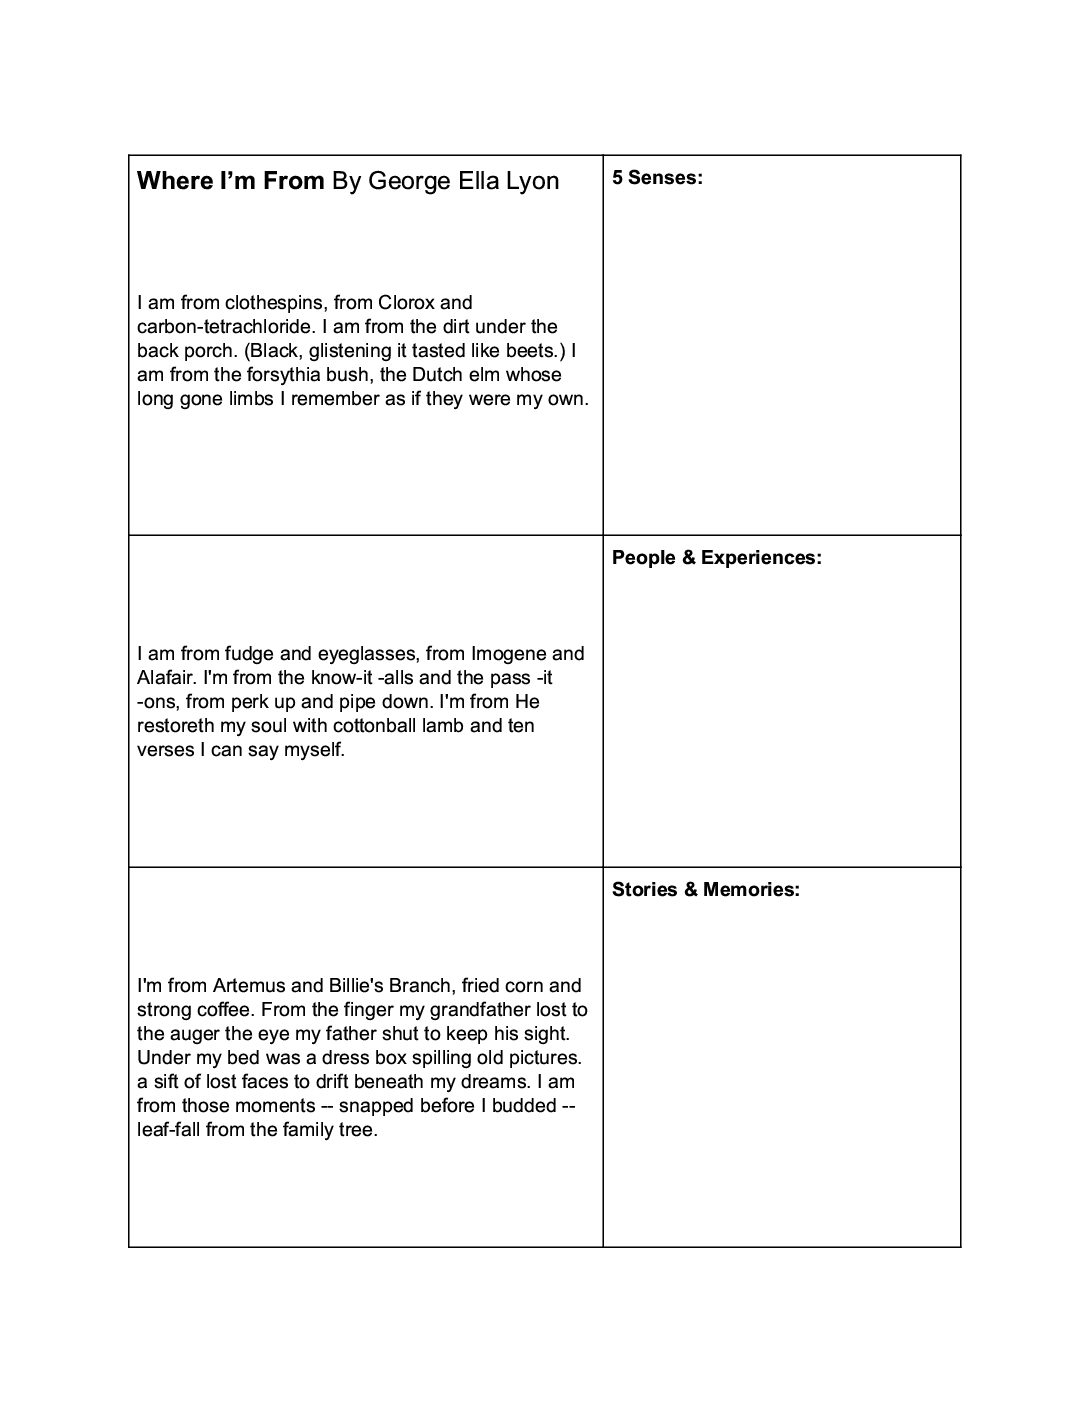
This lesson will fit within the introductory phase of the school year. “Where I’m From” by George Ella Lyon is a tool that is used in classrooms across the country at every grade level. Using her poem as a model, the teacher can create their own version to share a little about themselves to their students, and then students can share their own experiences through a modified version of the poem. Using visual aids such as illustrations, photographs, and a puppet meant to symbolize themselves, students can create a video project that will capture a personal narrative as a means of introduction for their teacher and peers.
Instructional Materials/ Resources:
- “Where I’m From” by George Ella Lyon
- Concept Clock
- Student Interviews
- Parent Interview Form
- Personal Photographs (4-5)
- Materials for Self Portrait Puppet Craft
(See Tutorials & Printables section of this page) - PuppetMaster App

Anticipated Student Challenges:
- George Ella Lyon’s poem may seem a little elevated for the younger grade levels, so teachers are encouraged to adapt the poems structure for their students
- Teachers are encouraged to create their own version of the “Where I’m From” poem to share a little about themselves with their students, model their expectations and discuss their structure to students
- Students should be permitted to create their own puppets to reflect their identity, however if teachers feel students need more support, they can utilize our templates.
Day 1
Anticipatory Set:
- Read Aloud: “Where I’m From” Reading (George Ella Lyon or Teacher Version)
- Chalk Talk:
- What did we learn about this person?
- Collect student feedback
- ADVANCED: Discuss structure of stanzas
Instruction & Lesson Activities:
(See Tutorials & Printables section of this page for details)
- Tell me about your Concept Clock.
The concept clock is a worksheet the teacher uses to help students draft and develop their narrative — a graphic organizer. As they coach students through creating their poem, they can call upon the concept clock to develop ideas or add some breadth to the poem. - Craft Demo: Give pointers to kids on how to build their self portrait craft, and make their photo collage.
- Stations:
- Puppet Party: making self portrait puppet craft
- Background Party: making photo collage
- Teacher Interviews
Closure:
Students should share their puppet and background with their peers and describe how this reflects who they are.
Homework:
Bring 4-5 photographs that represent who you are and where you come from
Day 2 / Day 3
Anticipatory Set:
Photo Parade! Students share their pictures with their table buddies or partners and discuss why they chose those pictures.
Instruction & Lesson Activities:
(See Tutorials & Printables section of this page for details)
Workshop:
- Puppet building in app
- Background building in app
- Students write a poem using their Student Interview & Concept Clock
- Creating PuppetMaster videos in app, with puppet performing student’s poem, and exporting to photo library
Closure:
Theater: Students share their videos with their class or in small groups.
Homework:
None
Differentiation Strategies:
- This is a student-centered lesson that is based on student choice and self-perception
- Students are invited to create their own puppet using found materials, drawings, or other craft products. Templates are available if necessary.
- Student poems can be free-verse and open ended, however the guided tools are available for teachers of younger students.
Assessment:
- Puppet
- Poem
- PuppetMaster Video
Self Portrait Puppet
Materials:
- Construction paper in range of skin tones
- Pipe cleaners, ribbon, or yarn in various colors for hair
- Colorful tissue papers or any colored paper
- Binder reinforcement stickers or googly eyes
- Markers, oil pastels, or crayons
- Recyclables e.g. magazines, bottle caps
- Buttons, stickers, anything decorative (optional)
- Glue
- Scissors
- Template below (optional)

Instructions:
- Draw a general outline on construction paper or trace our template, and cut out main shape. Then decorate as desired.
- Students should personalize with their design choices on the puppet’s appearance and clothes.
- Kids can also express likes and hobbies by adding items held in puppet’s hands.
- Make sure arms – and whatever they are holding – are separate from head and body, and none of these parts are obscuring each other.
- See video for example:
Printable Template
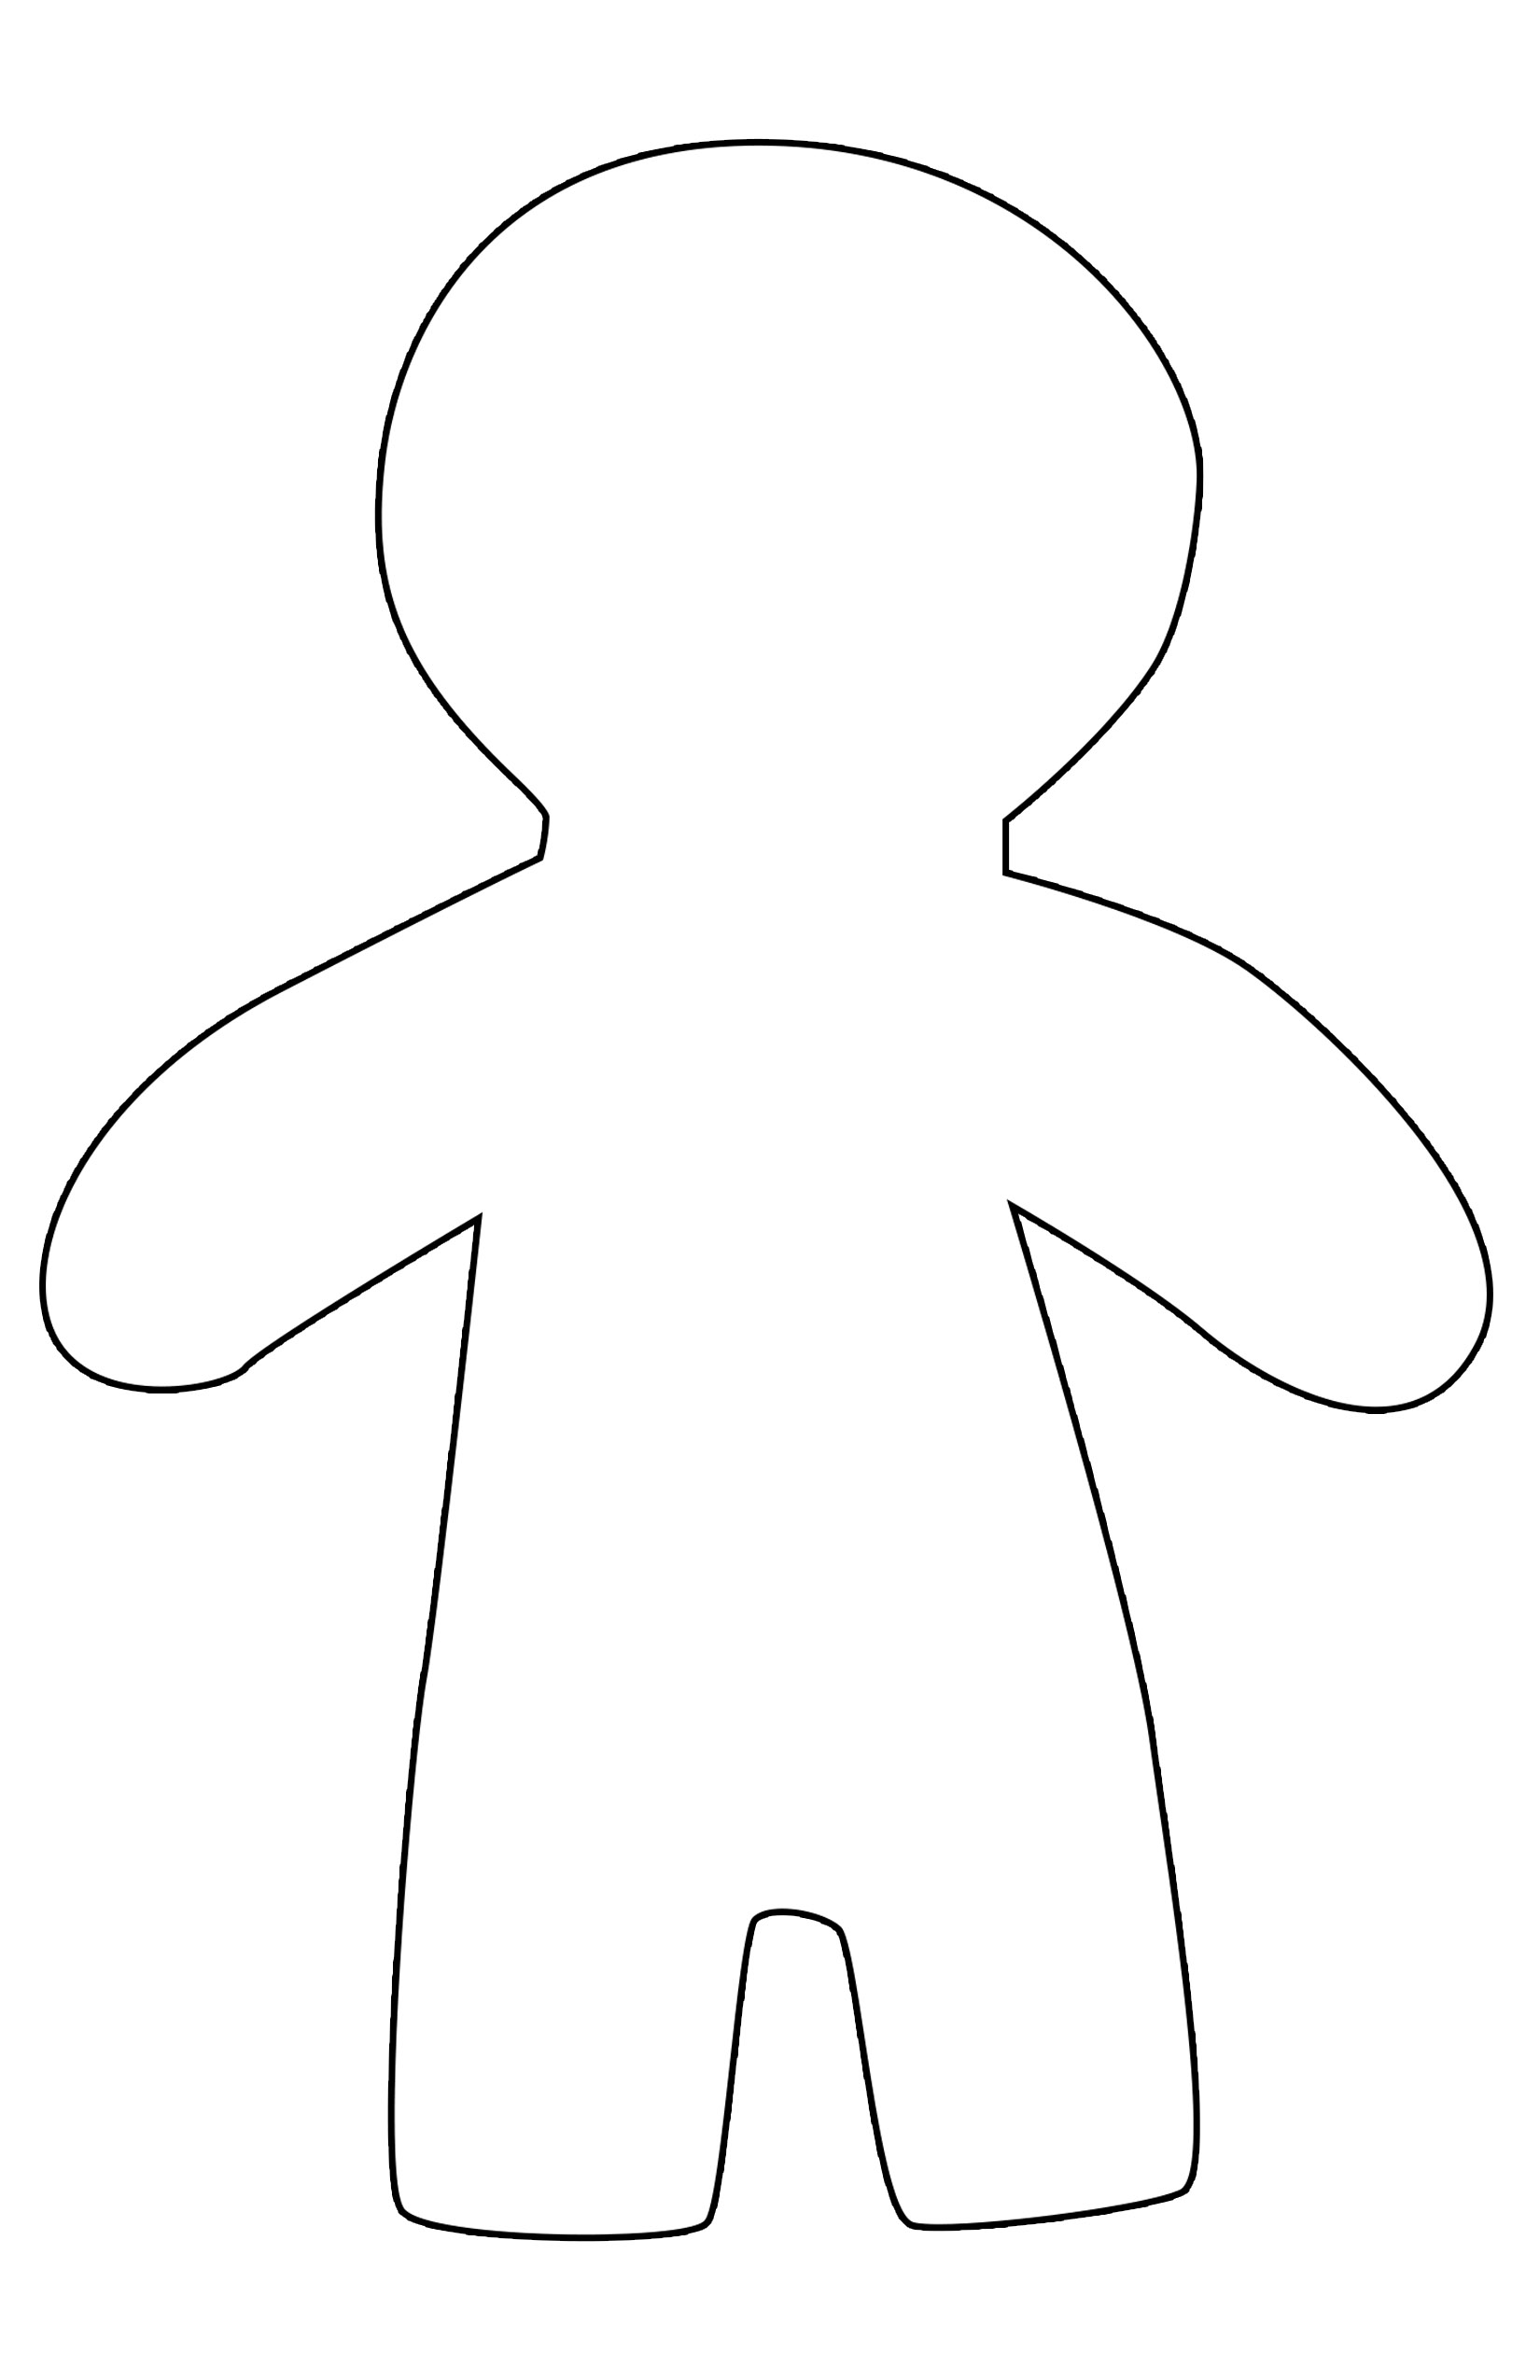
Photo Collage Background
Each student creates a simple collage of photos they brought from home, arranged on a large sheet of paper.
Creating the PuppetMaster Animation
See video tutorial of setting up puppet and background in PuppetMaster app.
This example shows our Time Capsule project, where the background is a photo of school. For Where I’m From, the process is the same but the background is the collage of photos from home instead.
Tips:
- You may find it useful to photograph the kids’ portraits and backgrounds with the device camera before even entering the PuppetMaster app. That way they are saved in your Photo Library for reusing or sharing.
- Try placing the artwork on the floor or low table, especially if still wet, so students can photograph from the top down and see the screen.
- You can mark the body parts with some overlap, for a continuous look.
- Marking the body parts in the app doesn’t have to be perfect, you can always go back in and edit this later.
- Don’t forget to place the puppet joints in the right spot at the last step. The Auto-fit button give a good start but usually some adjustments are necessary, and then of course hit the Save button.
- If animating with motion capture (moving your body in front of the camera), make sure only one student is in the shot, and try for a plain background. Keep hair out of face, tucked behind ears. Student should speak loudly so device will pick it up.
- If animating with screen touch, don’t forget multi-touch – you can drag the whole puppet around with one finger, use another finger to move a hand, another finger to move the head, etc. So get in there with both hands and multiple fingers.
- Don’t forget to hit Export and save the animation, and let it finish. The saved video will be in your Photo library. You can upload it to Google Drive or anywhere else. You can even take the video into other apps, if you want to edit together several “takes” of the animation, or do any other types of video editing to it.
See video for animation process using motion capture and screen touch methods:
More Inspiration
This example animation is from our Time Capsule lesson. For Classroom Climate, the results would be similar, but with sorted behaviors in the backgorund instead of a photo of school. For Where I’m From, the results would be similar but the background would be the Concept Clock, or one of the student’s photos brought from home.